Creating Perfect Shadows in Your Product Photography

Product photography is all about making your items look their absolute best. One aspect that doesn't get enough attention is the proper use of shadows. Shadows are incredibly important because they can add depth, dimension, brand personality, and a professional look to your product shots.
Product photography is all about making your items look their absolute best. One aspect that doesn't get enough attention is the proper use of shadows. Shadows are incredibly important because they can add depth, dimension, brand personality, and a professional look to your product shots. In this post we'll explore why shadows are so critical for your product images and the different techniques you can use to create them.
Why Shadows Matter in Product Photography
Make the Product Look More Natural: Without any shadows, a product can look flat and unrealistic. Adding shadows helps ground the product and make it appear three-dimensional, just as it would in real life.
Make Your Brand Look More Professional: Even if an untrained eye can't pinpoint why, product images with well-executed shadows simply look more polished and high-quality. This instills trust and credibility in potential customers. And most importantly for any e-commerce site, trust leads to sales.
Create Consistency Across Your Catalog: When all your product photos have cohesive, consistent shadows, it gives your brand's visuals a put-together, streamlined aesthetic.
Allow for More Creative Direction: Manipulating shadows opens up a whole world of creative possibilities in your product photography. You can use shadows to highlight certain features, create a specific mood, or make a product appear to be in a particular environment. If you're selling earthware dining sets, you want your shadows to convey the natural, homey feeling of your product. If you're selling a piece of next generation technology, you're going to want your shadows to give your product a bleeding edge feel.
Three Shadow Types to Consider
Shadows aren't one size fits all. Depending on your product, you'd want to consider one of the three types of shadows:
Natural Shadows: These are the shadows that would naturally occur when a product is illuminated. They lend an authentic, realistic look to your photos. Natural shadows can be tricky to control, especially for intricate products, so some post-processing may be required.
Drop Shadows: Also known as "standing shadows," these are the shadows that appear to be cast directly beneath a product, giving it the appearance of resting on a surface. Drop shadows are a classic technique that adds depth and dimension.
Reflection Shadows: By placing a reflective surface like plexiglass under your product, you can create the illusion that it's resting on a glossy surface. This reflection shadow effect makes the product look high-end and luxurious.
Techniques for Creating Shadows
There are many tools you can use as part of your workflow to create great shadows, but choosing the right one all depends on your timing, budget, brand and sophistication of the shadows you need:
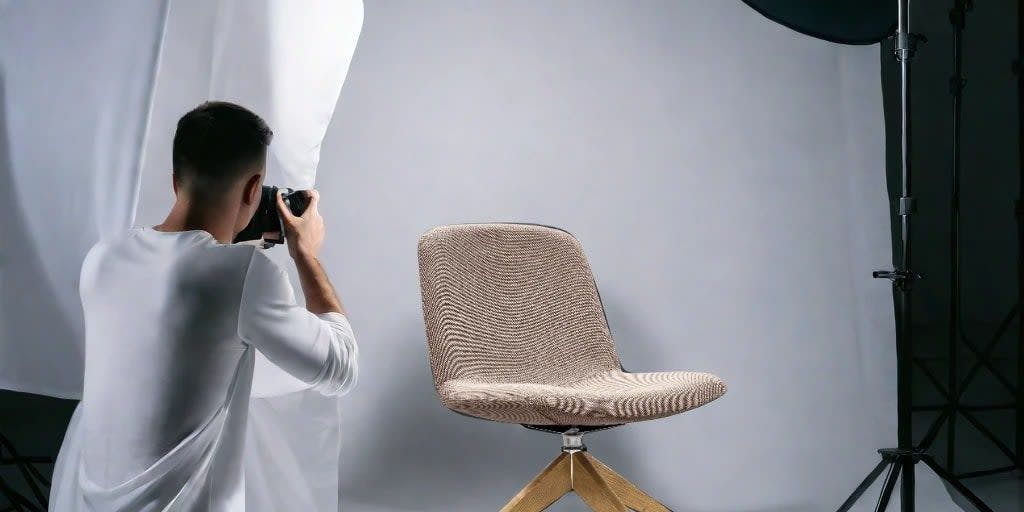
Custom Photography Custom photography of your product images is the best way to have fine-grained control over the shadows in your photography. This will allow you to configure a multi-light setup around your products to control all elements of the lighting, both on the product itself and the shadows being created around it.
Watch: Create YOUR perfect shadows in product and food photos
Pros:
- Allows for consistency of lighting on the product and the shadow
- Enables creating a multi-light setup for precise shadow control
- Allows experimenting with custom shadows using props
Cons:
- High cost to shoot and maintain this style of photography as you onboard new SKUs
- Time-consuming process, as elements of your products go in and out of stock, you cannot readily update your product images
- The cost and time required to shoot product images at scale is very high
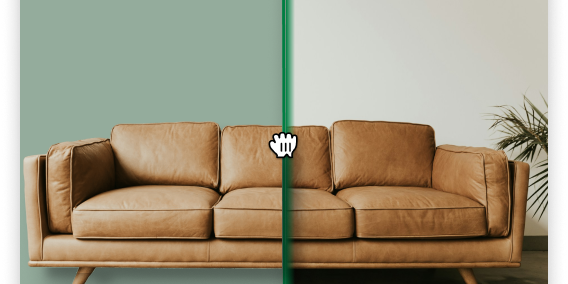
Photo Editing Adding shadows into your product images with Photoshop is one of the most common ways that brands will apply shadows to their product images. This allows you the ability to customize the shadows being created around your product image if you have the original image assets to edit.
Read: How To Use and Create Shadows in Your Product Images
Pros:
- Easily standardize new SKUs as they're onboarded
- Granular control of the shadows around your product image
- Practical way to create consistency in the shadows across your entire catalog
Cons:
- Requires technical knowledge for shadow creation and editing in Photoshop
- Significant effort required to apply this on each product image
AI Shadow Creation An increasingly popular way to control and apply shadows within your product photography is by using AI tools like ProductShots to generate and apply shadows around your products. This simplifies the process by providing the AI tools some direction in how you would like the lighting configured, and the tools will then generate the shadows and apply them directly into your product images.
Pros:
- Little technical knowledge required to get started
- Applying shadows to a product image is fast, allowing you to do this quickly across your entire catalog
- The output is of the same quality you get from a Photoshop application of shadows
Cons:
- Less granular control over the shadow placement than you would get through custom photography
- Limited ability to re-light your products
How to add shadows to product images in ProductShots
To get started with Product Shots AI shadow creation tools, simply head to the image editor section within the app.
Watch: Adding shadows to product images in ProductShots
- Add a Product to your canvas and re-size it to your preferred dimensions
- Click on the ‘Shadows’ function
- Set the Circumference of the light source (where the light is located in a 360° circle around your product, with 0° behind directly behind it, and 180° directly in front.)
- Set the Elevation of the light source (where the light is located above your product, with 0° being level with it, and 90° being directly above.)
- Set the Spread of the light source (how close is the light to your product, which determines how long the shadow should be.)
- Set the Strength of the light source (how bold the shadows are, from 0-100% strength.)
This will allow you highly detailed control over the shadows that appear on your products. And using our API, you are able to apply these shadows in a standardized way across your entire product catalog, giving you a consistent look and feel for every SKU.
Getting started…
No matter which approach you choose, mastering shadows in your product photography will take your visuals to the next level. Experiment with different techniques to find the perfect balance of realism and aesthetics for your brand.